

While MIG welding aluminum is more challenging than steel, it doesn’t have to be with the right equipment, parameter setup, and torch techniques.
It’s critical to note right away that aluminum doesn’t handle mistakes.
To produce genuinely high-quality MIG aluminum welds, you have to take precautions at each of the critical components of the welding process. One mistake and you are dealing with weld discontinuities and defects.
Welding Aluminum Challenges
- Aluminum has 5 times the heat conductivity of steel, but 2 times lower melting point. This poses a high burn-through risk, as you must run high amps to offset aluminum’s high heat dissipation.
- The aluminum oxide layer melts at 3700°F (2,037°C), while the base metal beneath it melts at 900-1200°F (480-650°C).
- The need to clean the oxide layer.
- Cross-contamination sensitivity with carbon and other impurities in the shop.
- Aluminum wire is too soft, risking birdnesting in the feeder and kinking in the liner.
- Multiple alloys on the market, all of which behave differently during welding.
- Hot cracking during weld cooling, mostly caused by alloy composition and filler wire selection. (see image below)
- Crater cracking at the end of the weld. This happens due to insufficient deposition volume and high shrinkage stresses. Cooling weld starts pulling (internal stress) the surrounding metal. If there’s a crater (insufficient volume), it will crack under stress.
- Discoloration after anodization due to mismatch of wire alloy and base metal.
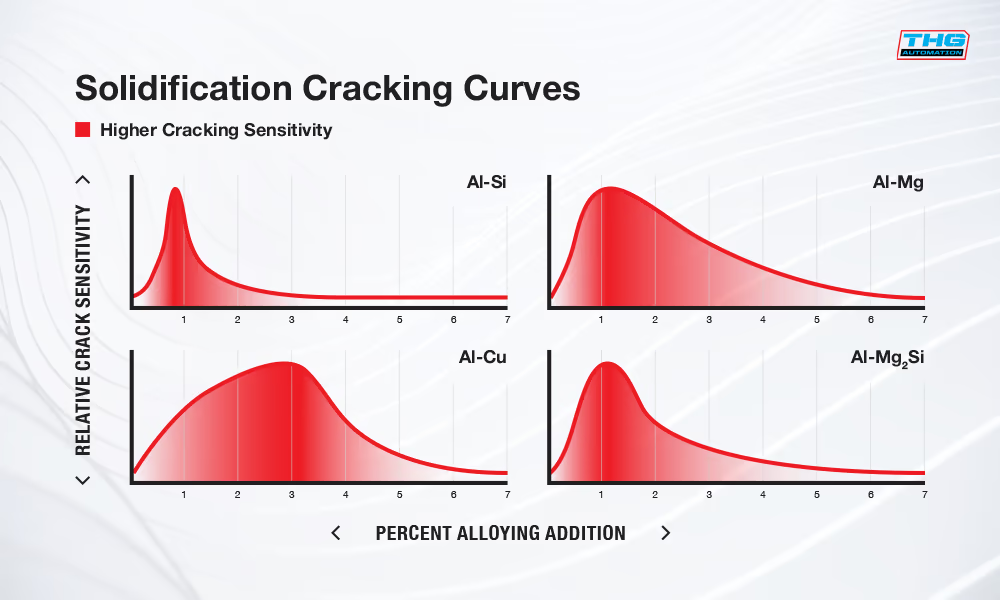
The graph shows the likelihood of hot cracking due to the alloying percent. It starts high with a low amount of the alloy, such as Si, Cu, Mg, and Mg2Si. To minimize the hot cracking, do the following:
- Check the alloy composition to know the current percentage of the alloying element.
- Conclude if the alloy is in the peak zone.
- Avoid using the matching wire alloy as the base alloy if it’s prone to cracking.
- Use the matching wire if the alloy is not prone to hot cracking.
Aluminum alloys that are considered unweldable without filler wire have chemistries near the peaks on the graph. Alloys that are least likely to crack have the chemistry far off the peak.
Preclean The Aluminum And Avoid Cross-Contamination
Aluminum forms an oxide layer the moment it hits air. It’s invisible, always there, and melts at nearly three times the temperature of the base metal. Weld over it, and you’re welding over contamination.
- Wipe the surface with acetone to remove oils and grease.
- Brush with a stainless steel wire brush, one that has never touched other metals. Always after the acetone wipe, not before. Brushing first pushes contamination deeper.
- Keep your aluminum tools separate. Steel particles from shared brushes embed in the surface and cause porosity that won’t show until the part fails inspection.
More advanced cleaning options include:
- Laser cleaning
- Ultrasonic cleaning
- Chemical etching
MIG’s DCEP polarity also provides cathodic cleaning action. The arc blasts oxide off the surface just ahead of the puddle. Critical, but not a substitute for steps 1–3.
Welding Technique And Torch Manipulation
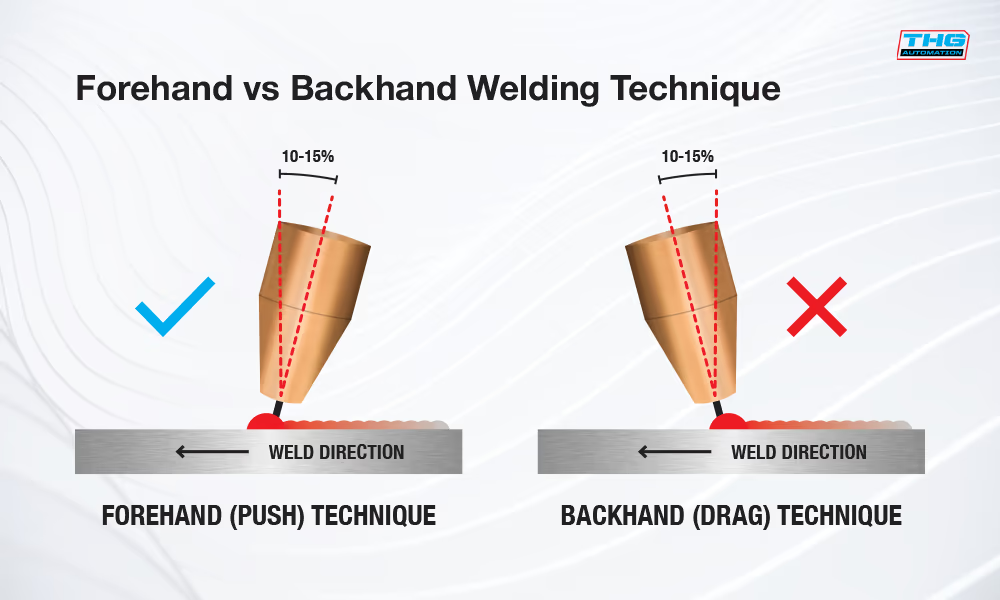
- Push, don’t pull. No dragging either. Forehand travel only. Pushing blows out the oxide layer ahead of the arc. This lets the DCEP cleaning action do its job.
- Maintain a torch angle of 10–15°. Any steeper and you lose arc stability. Any shallower and you lose penetration.
- Apply the right contact-tip-to-work-distance (CTTWD) for the welded wire diameter.
- Be careful with heavy weaving, as it risks cold lapping or other weld defects.
- Be mindful of reflective heat. It can cause burnback issues.

Troubleshooting MIG Aluminum Welds
Birdnesting
- Switch to a push-pull gun
- Check drive roll tension; it shouldn’t be too tight
- Use U-groove drive rolls, not V-groove
Porosity
- Verify 100% argon at 20–30 cfh
- Check for air drafts disrupting shielding gas
- Re-examine your pre-cleaning process — porosity is almost always a contamination problem
Hot cracking
- Review your filler wire selection against the base alloy
- Avoid matching wire to crack-prone alloy compositions
- Select a weld joint design that allows base metal dilution with the wire
Weld discoloration and soot
- Decrease gun angle
- Remove spatter buildup from the torch
- Use push angle
Wire burnback
- Keep a 3/8 to 1/2 inch (CTTWD)
- Increase wire feeding speed
- Reduce wire tension
MIG Welding Aluminum Equipment Setup
Setting up your MIG welding power source and making the right gun type, wire, and gas selection is critical for aluminum welding. But, some details will vary by thickness, alloy, and joint design.
MIG Gun Selection | ||
Standard push MIG torch | Spool Gun | Push-Pull Gun |
Difficult to use. Aluminum wire will kink and cause birdnesting in wire feeder. | Helps prevent birdnesting, but not reliable enough for manufacturing. | Industry standard for wire feeding reliability in production work, especially for robotic welding. |
Transfer Mode Selection | ||
Short-circuit MIG | Spray Transfer MIG | Pulsed MIG |
Not used for aluminum, too cold. | Works well with thick sections. Largely replaced by pulsed MIG. | Excellent for aluminum. It alternates between high heat of spray transfer and a cooler phase. |
Consumable Selection | ||
MIG gun liner selection | Gas selection | Wire alloy |
Do not use steel liners. It’ll shave the wire and clog the liner. Use polyamide (PA) for low amp jobs and Teflon (PTFE) for medium to high amp welding. | 100% argon. The best overall choice. Mixture of Argon/Helium for specialty jobs. Not really needed unless required by the procedure. | Traditional, general-purpose wires like AWS 4043 and 5356 are a good choice for many 4000 and 5000-series aluminum alloys. The 5356 is easier to feed, while the 4043 offers better wetability and bead appearance. Always consider the wires’ chemical compatibility with the alloy to avoid selecting a hot-cracking-prone match. |
Use The Right Equipment To Achieve High Productivity And TIG-Like Quality
There’s a difference between MIG welding aluminum to fuse two pieces and MIG welding aluminum to pass an AWS or customer inspection. Or for welds to look TIG-welded. The gap between those two outcomes can be bridged by good equipment selection.
Fronius Power Sources and Pulsed MIG
Standard spray transfer MIG gets aluminum fused. Pulsed MIG gets it done right. And Fronius power sources have the cleanest, most perfected Pulsed MIG on the market, in our experience. Their power sources produce exceptional weld fusion while providing a TIG-like stack of dimes.
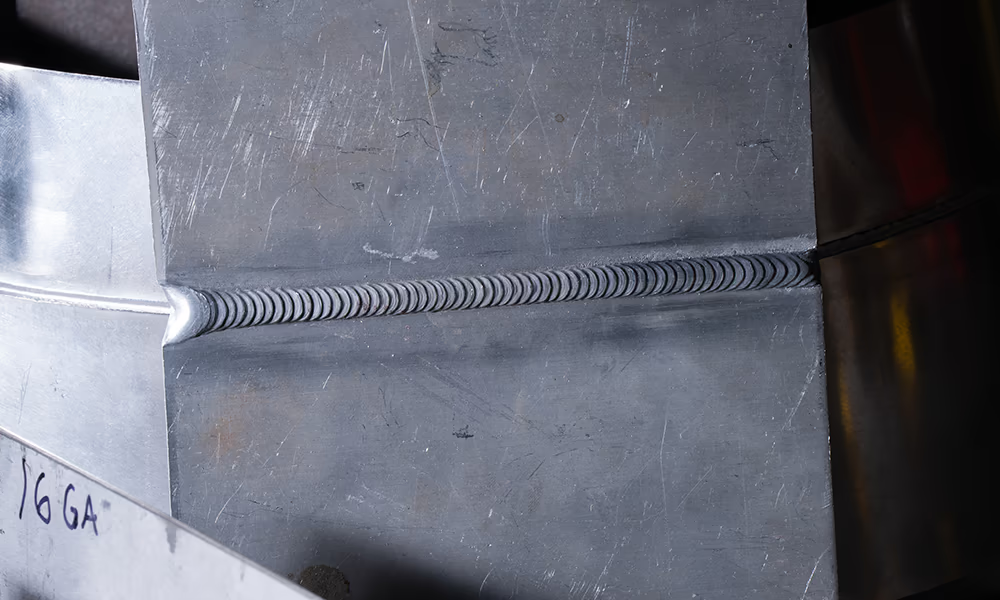
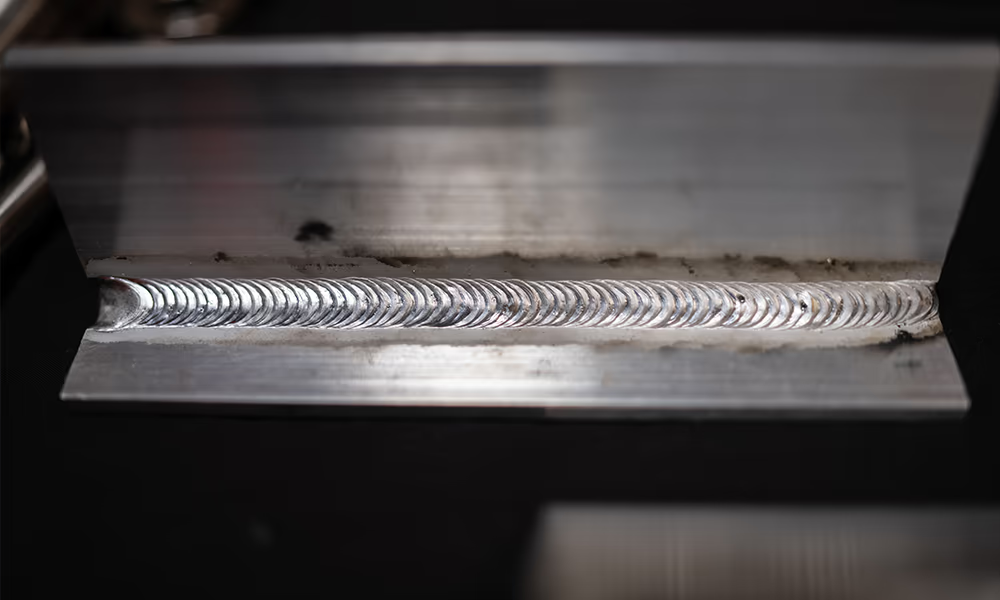
After all, Fronius was the first to develop the digital power source and the pulsed MIG welding process, their TPS, in 1997. Today, their power sources are second to none.
Pulsed MIG alternates between a high-peak current — enough to transfer a droplet across the arc — and a low background current that lets the puddle cool slightly between pulses.
The result is precise heat input, a stable arc at lower average amperages, and dramatically reduced spatter. For aluminum specifically, this means better oxide cleaning action ahead of the puddle, less burn-through risk on thinner sections, and a bead profile that’s consistent enough to pass visual inspection without grinding.
Fronius SynchroPulse lets you modify every single critical parameter to achieve the right bead profile and depth of penetration. This includes arc length, pulse frequency, pulse amplitude, and more.
If you’re welding aluminum for customers who care what it looks like, a capable pulsed MIG power source isn’t optional equipment.
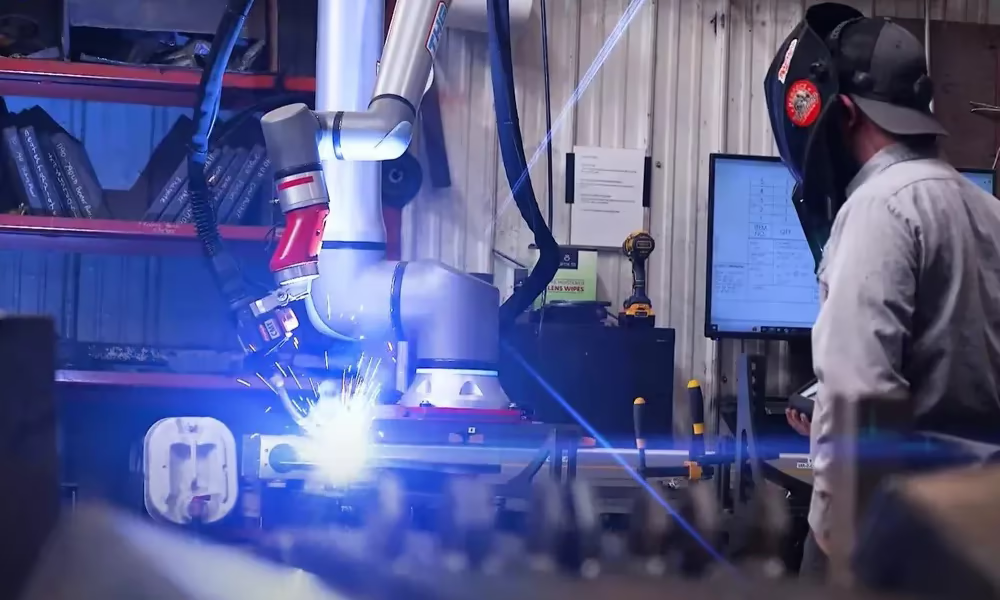
That’s just one of the reasons why THG chooses Fronius for robotic welding applications.
A Note on Collaborative Welding Robots
If you’re running aluminum parts with any regularity, it’s worth knowing that cobot welding systems exist specifically to extend what a skilled welder can do, not replace them.
A cobot holds the torch at the exact angle, distance, and travel speed your process requires, every single pass.
For aluminum, where technique consistency is the difference between a clean bead and a scraped part, that kind of repeatability matters.
Properly integrated cobot welding systems can also dramatically boost productivity. For example, see below how Funkhouser Racecars, a small 4-man fab shop in California, boosted their welding throughput by 700%.
And robotic welding programming can be very simple. Just hand-based robot arm manipulation (to show the cobot the weld points) and intuitive tablet-based fine-tuning. And they’re not built for high-volume production lines only.
Shops running low-volume, high-mix aluminum work use them precisely because the setup flexibility matches how job shops actually operate.
It’s one option worth considering if aluminum volume or quality requirements are creating bottlenecks.
Take MIG Welding Aluminum To The Next Level
MIG welding aluminum well is hard. Doing it consistently, across a team — that’s where most shops hit a wall.
THG Automation builds modular cobot welding systems designed around real production challenges, not lab conditions. If aluminum quality, consistency, or capacity is creating pressure in your shop, a cobot system might be a simpler answer than you think.
No robotics background required. No minimum production volume. Just a system that holds your process exactly where you dialed it in, every single pass.Talk to our fabrication experts, and we’ll help you determine if automation fits your shop.