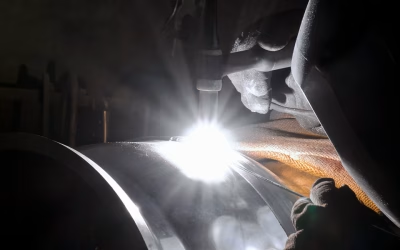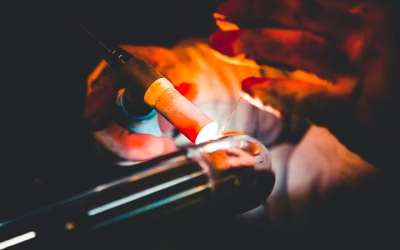


Most welders fail with stainless because they struggle with heat management. Stainless doesn’t forgive excessive heat input, and TIG can definitely overcook it like any other process. However, TIG welding stainless steel is relatively easy if you select the right equipment and apply the correct parameters and welding technique.
Stainless Steel Welding Challenges
Stainless steel’s biggest enemy in welding is its own thermal behavior. Unlike mild steel, stainless has poor heat dissipation. That heat retention is the root cause of nearly every problem welders run into with the material.
The consequences stack up fast:
- High heat expansion and distortion — Poor thermal conductivity means heat concentrates in the weld zone. Since stainless has high thermal expansion combined with poor dissipation, the weld zone will be extremely hot while the rest of the material won’t heat at the same rate. The weld zone will expand unevenly, increasing the chance of distortion.
- Sensitization — Prolonged exposure to heat between 800-1650°F (425°C–900°C) causes chromium carbides to form at the grain boundaries. This depletes the chromium that gives stainless its corrosion resistance. The part may look fine, but it’s compromised where it matters most.
- High heat input requirement — Despite being heat-sensitive, stainless requires sufficient heat to achieve proper fusion. The challenge is controlling where heat input propagates and how long it stays in the metal.
- Discoloration — Poor heat control or gas shielding causes excessive surface chromium oxide buildup, signaling surface and subsurface damage.
The animation shows just how quickly the chromium migrates to the grain boundary to combine with carbon into chromium carbides under high heat. When this happens, the heat-affected zone (HAZ) loses chromium and the corrosion resistance it provides. And we don’t want that. Stainless steel is selected primarily for corrosion resistance.
Reading Weld Colors On Stainless Steel
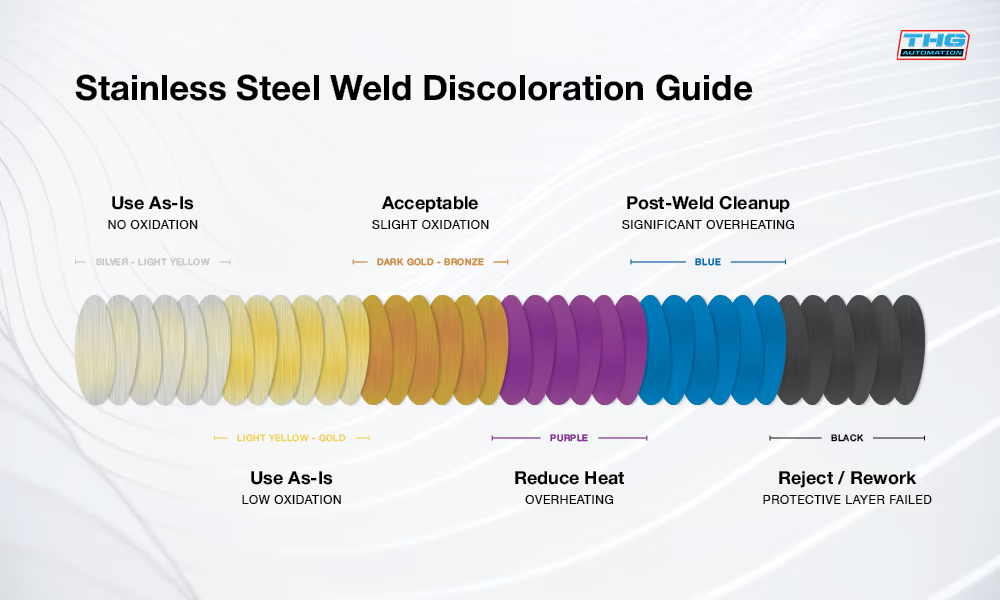
Weld color is your fastest visual indicator of heat input. Weld discoloration on stainless steel is the result of the thickening of the chromium oxide layer under heat. The thicker the oxide layer, the darker the color. And the higher the heat input, the thicker the layer.
On stainless, the heat tint sequence runs from acceptable to damaging:
Color | Overheating Level | Condition |
Silver / Straw | Low | Ideal, minimal oxidation |
Gold | Moderate | Acceptable in many applications |
Blue / Purple | High | Borderline, reduced corrosion resistance |
Grey / Black | Excessive | Damaged, sensitization likely occurred |
Hot Cracking And Filler Metal Selection
Stainless steel alloys containing elevated sulfur and phosphorus levels are prone to hot cracking. It’s also known as solidification cracking that occurs as the weld pool cools. These elements lower the melting point of grain boundaries, making them the last point to solidify and the first thing to crack under stress.
The fix is simple: select a matching filler metal to the base material grade. The ER308L, ER316L, and ER347 are the standard choices for austenitic stainless filler rods — the “L” designation indicating low carbon, which directly reduces sensitization risk and hot cracking susceptibility.
Weldability of Stainless Steel Types
Not all stainless steel responds to arc welding the same way. This article focuses on austenitic stainless steel TIG welding, the 200 and 300 series. Austenitic is the most widely used stainless type in fabrication and the most straightforward to TIG weld.
Other stainless families have different welding considerations:
Stainless Type | Weldability |
Ferritic | Weldable but prone to grain growth, embrittlement in the HAZ, and hot cracking. |
Martensitic | Difficult. High hardness and cracking risk; requires pre and post welding heat treatment. |
Duplex and Super Duplex | Difficult. Requires very strict heat and filler metal control and high welding expertise. |
Precipitation Hardened | Weldable but requires post-weld heat treatment to restore properties. |
How To Pre-Clean Stainless Steel For Welding
Stainless steel is highly sensitive to surface contamination, which includes cross-contamination with other shop materials. Keep these rules non-negotiable:
- Dedicated tools only — wire brushes, wire wheels, and disks used on mild steel carry embedded carbon. Use tools exclusively for stainless.
- Clean the base metal — acetone or a stainless-specific acid cleaner removes oils, oxides, and surface contaminants. Clean at least 1/2″ adjacent to the weld groove.
- Consider laser cleaning — for high-value work, laser cleaning is the most thorough and non-contact option available.
- Isolate your workspace — grinding or cutting carbon steel nearby deposits particles on your stainless. Separate the two materials physically if possible.
TIG Welding Stainless Steel Equipment Setup
Due to stainless steel’s sensitivity to oxidation and heat, correct equipment setup is critical to produce sound welds.
Parameter | Recommended | Why It Matters |
Tungsten Electrode | Lanthanated or Ceriated | Handles DC cleanly, maintains a sharp point, stable arc at lower amperages |
Tungsten Prep | Ground to a sharp tip, or sharp with a flat tip. Do not ball tungsten for stainless. Avoid a taper larger than 2.5 times the electrode diameter. | Sharp tip creates a wide puddle, while a flat tip helps ensure full penetration. |
Torch | Gas lens setup | Improves shielding gas coverage |
Torch Cooling | Water or air-cooled | Water cooling for high amperage, air-cooled torch for low amp, thin material welding |
Shielding Gas | 100% Argon | Standard for TIG on stainless. Clean, inert, no carbon |
Gas Flow Rate | 15–20 CFH (7–9 L/min) | Sufficient coverage without turbulence |
Polarity | DCEN (Direct Current Electrode Negative) | Concentrates heat at the workpiece, not the tungsten |
Amperage | 1 amp per 0.001″ of material thickness as a rule of thumb | Prevents excessive heat input on thinner gauges |
Foot Pedal or Robotic Welding | Strongly recommended | Allows real-time amperage modulation as the weld pool heats up |
Pulsed TIG Dramatically Improves Welding Heat Control
Pulsed TIG alternates between the high, peak current and the low, background amperage many times per second. The peak current achieves fusion. And the background current maintains the arc while letting the heat slowly propagate in the rest of the metal. As a result, the average heat input reduces and so does the warping.
Pulsed TIG settings:
- Peak current – High amperage that achieves fusion. Match amps to material thickness.
- Background current – Low amperage that maintains arc between pulses. 25-40% of peak current.
- Pulse frequency – Pulses per second. Start with 1-2 PPS for manual welding and go higher from there if necessary. Automated TIG allows easier use of higher PPS settings.
- Duty cycle – Time at peak current. A good starting point is about 30-50%.
Lower average heat input directly addresses stainless steel’s two biggest failure modes:
- It keeps the heat-affected zone below the sensitization threshold, protecting corrosion resistance.
- Reduces differential thermal expansion that causes distortion. On thin gauge stainless, pulsed TIG is often the difference between a usable part and scrap.
Welding Technique And TIG Torch Manipulation
Setup and parameters get you to the starting line. However, it’s the technique that actually determines the outcome. Master it, and you’ll be stacking dimes on stainless with little distortion, defects, and risk of destroying the corrosion resistance.
- Pipe back purging — since stainless is highly sensitive to atmospheric contamination, you must purge the pipe and tubes from inside with argon. Plug the pipe from both ends and introduce argon to displace air from inside them.
- Tungsten stickout — extend the tungsten 2–3X the electrode diameter beyond the gas cup. Too short and you lose visibility of the puddle. Too long and shielding gas coverage deteriorates, leaving stainless vulnerable to oxidation.
- Electrode-to-work distance — maintain a 1–3mm arc gap. Longer arc length can lose precision, cause oxidation, and reduce shielding gas coverage. Keep it tight and consistent throughout the pass.
- Travel speed — move quickly and without hesitation. Dwelling in one spot dumps heat into the material.
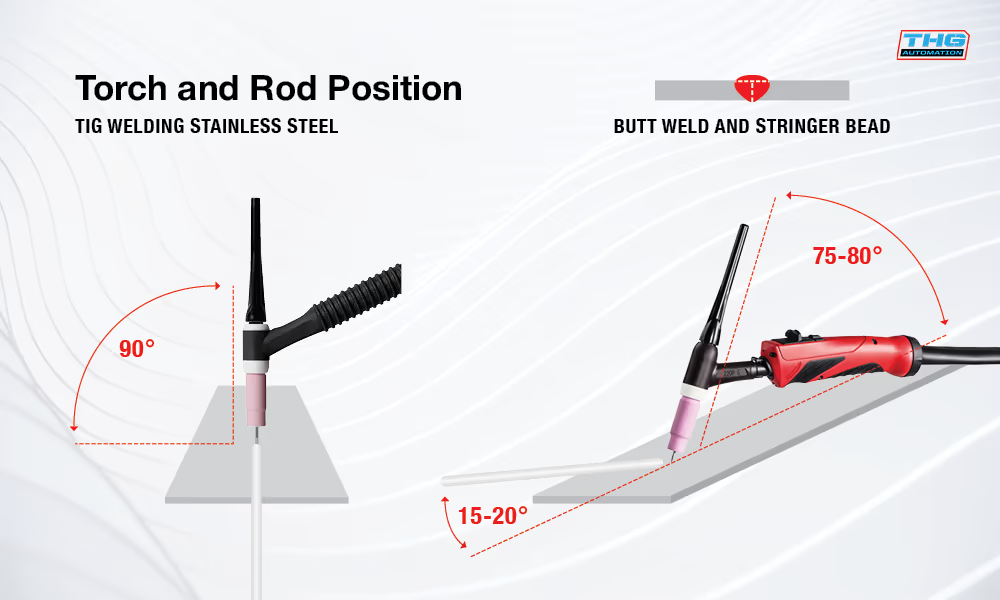
- Work and travel angle — hold the torch at 90° to the joint (work angle) and 75–80° in the direction of travel (travel angle), as shown in the diagram above. This concentrates the arc precisely and keeps shielding gas coverage centered over the weld pool.
- Use a heat sink — apply a block of copper or brass from behind the seam to let some heat escape into it. This reduces the chances of heat damage and distortion.
Use The Right Equipment For Maximum Productivity And Quality
Everything we covered thus far only matters if your welding equipment can actually output the right settings consistently. TIG is a sensitive welding process, and stainless steel is a sensitive material. Equipment reliability is a must for professional jobs, especially in automotive, food and beverage, aerospace, power generation, and other high-value industries.
Fronius Power Sources Are Built For Reliable TIG Welding
Fronius was first to develop modern pulsed welding power sources and remains the benchmark for high-end TIG welding, especially for stainless.
Some of the most beneficial Fronius iWave TIG welding features for stainless are:
- High reliability. The TIG welder precisely outputs the set parameters into the welding arc.
- Reproducible arc ignition. Consistent arc starts every time.
- Precise pulse control. Duty cycle adjustment lets you set the exact time ratio of peak to background current.
- Low amp start. Critical for thin sheet metal welding.
- Fronius CycleTIG. Gives you an additional layer of process control for maximum heat input regulation.
- Multiple waveforms for Pulsed TIG. Hard rectangular, Soft rectangular, and Sinewave for more control.
The iWave also supports automated welding applications natively, which leads directly to the next step for shops that need to scale.
Cobot TIG Welding Expands Your Team’s Throughput
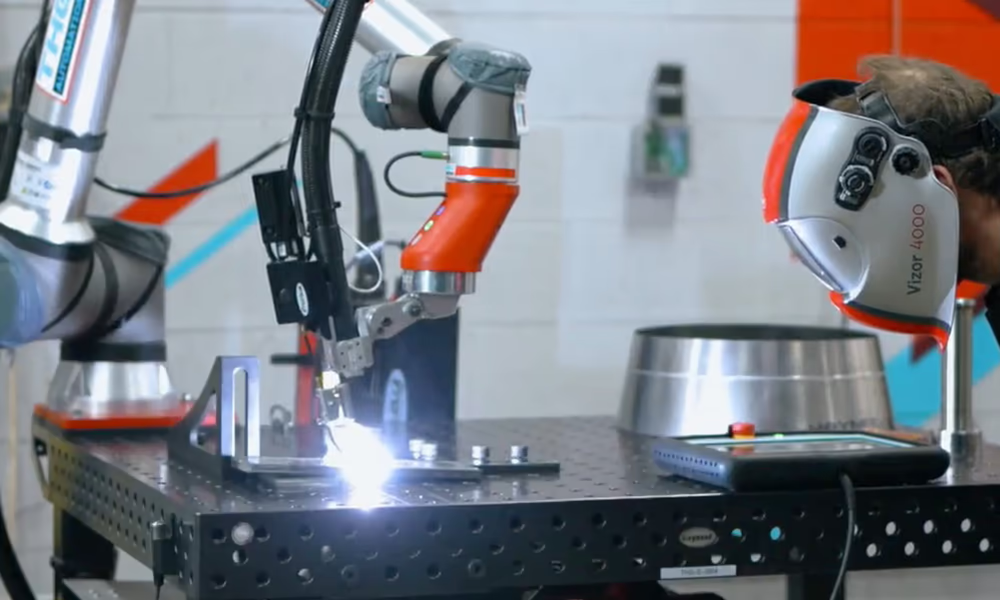
If your stainless steel work demands consistent repeatability across multiple parts, a collaborative welding robot delivers exactly that. A cobot simply executes your team’s knowledge and skills with mechanical precision, pass after pass, without fatigue or drift.
Small shops often assume that robotic welding isn’t for them because they don’t have sufficient volume or robotic skills, but this is a common misconception.
THG Automation’s TIG cobot systems are designed for real shop floors, including high-mix, lower-volume production. You bring the process knowledge. The cobot handles the execution.
You don’t need robotic and programming skills or serial, high-volume to significantly improve your shop’s productivity. Here at THG, we’ve helped many small shops improve their results significantly. For example, our customer, a 4-man racecar components shop in California, improved their throughput by 700% with a simple cobot installation.
If you’d like to learn more or see how collaborative welding systems would look for your shop, talk to our fabrication experts.